There’s never been a better time to reap the benefits of homegrown food. The quality is higher, the taste is better, the abundance keeps dollars in your pocket, and you know exactly what was, or was not applied to produce. An important concern for you and your family.
Planes, Trains & Automobiles
As organic produce continues to rise in cost, it is also coming from farther away. Produce that comes in from Mexico, various South American countries, and Europe to be sold in the United States raises two concerns: fuel and quality.
The fuel for flight and ground transportation is built into the price of all produce. However, organic produce is coming from farther away where monocrop farms are growing on a large scale and creating environmental and biodiversity concerns. The length of transportation means that produce is selected and grown for travel quality, not taste quality. It is durable, not delicate and lush. “Stable” produce does not get the mouth watering in the same way as a summer tomato, warmed from the sun, and heavy in the hand, full of juice and seed waiting to impart intense flavor. There is a reason a simple tomato sandwich, gazpacho or panzanella salad is such a pleasure in the heat of summer, each celebrates the fleeting glory of the freshest tomatoes. There is no replacement for truly fresh produce.
Soil Health & Your Health
If you have compost and garden soil available to you, it is one of best natural resources you can use. Industrial farming means a constant leeching of soil, depleting nutrients for a crop and most often replacing them with a limited formula of NPK – nitrogen, phosphorus and potassium. This formula only ensures growth, not nutrient density. Meaning, the carrots or tomatoes you grow in your own nutrient-rich dirt will contain a wider array and higher quantity of beneficial vitamins and minerals. If you don’t have such soil available, there are a number of organic soil options to purchase while you start composting leaves, grass and suitable kitchen waste for next year – it’s worth it!
Cost Savings
Consider for a moment that a single plant costs about $4. In comparison, organic strawberries are pushing $4 a pint, heirloom tomatoes (the most delicious) are sometimes $6 / Lb. For very few hours dedicated to gardening, or rather plopping a plant into soil, watering and not too much else, your small effort yields returns for weeks. A tomato plant can produce 12 to 20 pounds of fruit. That comes out to $72 to $180 of cost savings for 1 plant! Now think of growing a just single head of lettuce or a pot of parsley from seed – the dollars add up very quickly.
Variety
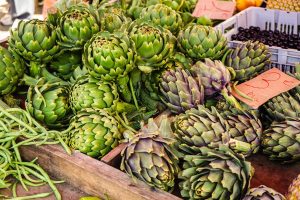
One of the most fun things to see at a farmer’s market at the height of the season is what wild produce the growers have selected for the year. Japanese eggplant, gold cherry tomatoes, giant, pickling, and miniature cucumbers, and the sweetest melons that would never travel well. There are always a few surprises. These “funny looking” vegetables almost never appear in grocery stores because they aren’t grown on a large scale, are often more tender, and only discerning customers want to experiment.
As we know, variety is the spice of life, and we have a woefully limited variety from our grocery produce. There are loads of flavor, size, and color variations with which to experiment. Some vegetable varieties are wonderful for eating raw, while some are better for baking, frying, making soups or sauce. You get to experiment with your own garden and grow something fun while helping to maintain diverse heirloom varieties.
Nurturing Growth
Beyond all of these reasons, watching a garden grow is a satisfying pleasure. The few moments you take to watch spirals, tendrils, leaf, and bloom appear in the warmth of sun is a welcome break in nature. Growing your own plants instills the same wonder in children who often become interested helpers.
Both you and your little helpers are more apt to take an interest in – and eat – more vegetables if they are readily available and you have grown them yourselves.
Start this year
Below are a few options for different kinds of garden beds from simple to slightly more involved, depending on how much you want to do this year. If in doubt, throw a tomato plant into a pot and remember to water it every day or so. You won’t regret it.
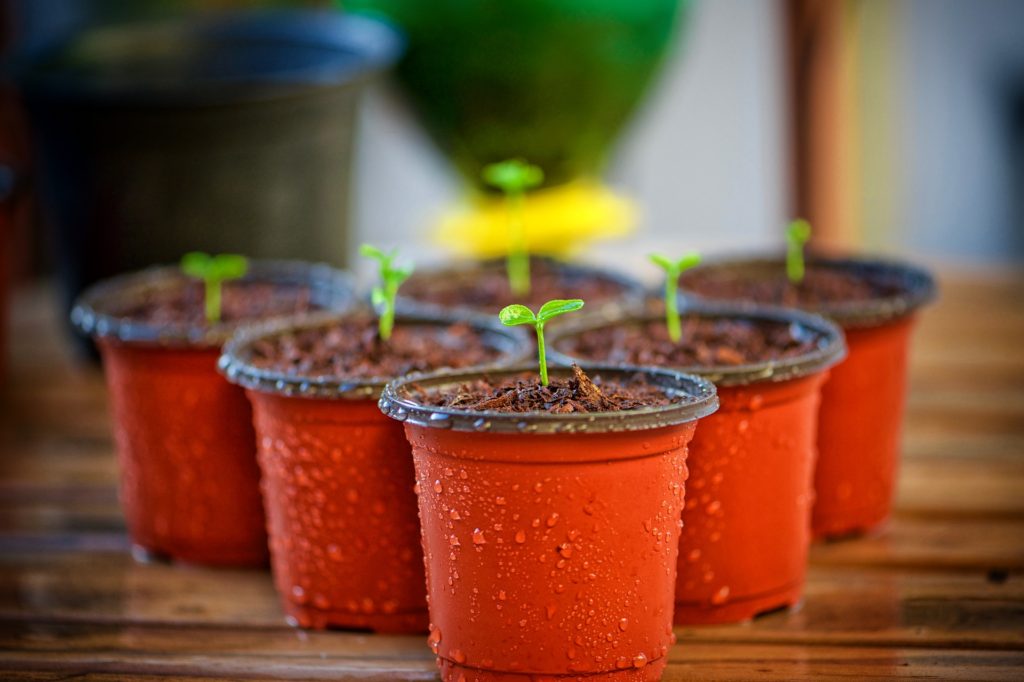
Container Planting
The benefits of container planting are many. It is a manageable amount of effort versus an entire garden. Containers planted close to the house allow you the ability to keep an eye on plants from hungry pests, squirrels, groundhogs and other regional munchers that, trust us, can take an entire garden down as their personal salad bar – more than once. We’ve got stories.
For most container planting, full sun is best, except in areas the upper range planting zones, where partial shade is needed. Just keep an eye out for tinged leaves that burn from being over-exposed to sun. If this happens, simply move pots to a spot that gets morning or late day sun, but is shaded during the most intensive heat and direct sun of the day.
Choose containers that offer good drainage at bottom of pot. The size should be about 5 gallons for a typical tomato plant.
Potting soil should ideally come from cured compost such as leaves, grass clippings, and kitchen compost such as vegetable and fruit peels and waste, coffee grinds, and eggshells. However, that takes time to breakdown, so to start growing this year, you may need to purchase organic soil specifically for vegetables / fruit. To get the most sustainable version, look for organic brands without additives.
When the season is over, you can compost all of your organic potting soil including spent plants, cutting them and turning into the compost to ensure all leaves and roots are covered and do not get sunlight. If compost isn’t an option, you can combine and store potting soil for the next year in another container. You may need to supplement with additional compost to feed the soil the following year.
Starting a Garden Bed
Before you consider the old style of bed creation and the impending backbreaking labor to dig everything up, you could instead raise the garden.
Raised Garden Bed
This method can be used for the same growing season. It is best to plan ahead by a few weeks to allow materials to naturally compost and settle.
- You will need:
- 2, 2” x 12” x 8’ untreated wood plank boards
- 12 pieces of 18” rebar
- A rubber mallet (to pound rebar into ground)
- Newspaper
- Compost
- Select the area for the bed.
- Cut grass grass close as possible for the area.
- Using 2, 2” x 12” x 8’ untreated wood plank boards, cut one in half (many lumber stores will do this for you).
- Arrange the planks into a rectangle
- One by one, hammer 2 rebar pieces directly into soil as a support on the outside of each board, continue, using 12 pieces of rebar total to create a raised rectangle.
- Lay out newspaper on the bottom of the bed, covering all grass. (The point is to smother out any sunlight, a trick to prevent grass and weeds from germinating and growing.
- Spray newspaper with hose to saturate
- Fill the bed with clean garden soil (not potting soil) or fully decomposed compost
- Ready to plant!
- Note, garden beds can also be stacked using longer rebar for taller beds. Some gardeners prefer this for comfort and easier reach.
Organic Life Magazine has a great video on building a raised bed with this method: https://www.rodalesorganiclife.com/garden/sheet-mulching/slide/2
Thinking About Next Year?
Create a “Cardboard Bed”
This method is best for autumn as the materials will degrade and become part of the garden ecosphere over a couple of months thanks to earthworms and other garden helpers.
- Select the area and mark the perimeter with chalk or spade marks
- Cut existing grass in that area as low as possible, even if making some bald patches.
- Cover the area in natural compost or composted manure (if this must be purchased, ensure it is compost, not potting soil or other material not suitable for vegetables)
- Cover the compost with a single layer of cardboard. The idea is to smother any light from reaching the grass or weed seeds below.
- Spray the cardboard thoroughly with water.
- Cover with 2-3 inches of compost and garden and food scraps. These can include grass clippings, food scraps, coffee grounds, egg shells, vegetable and fruit refuse and peels. This should not include anything such as meat, bones or fats. The material layered on the cardboard breaks down easily into nutrient-rich soil.
- Mix and turn the soil to ensure there are no remaining larger pieces of compost material. Add another 1-2 inches of well broken down compost, and start planting!
Get growing! We’d love to hear what you’re planning and growing in comments.